How to download JSON utility for ITR
Introduction:
Filing income tax returns (ITRs) can seem like a daunting task, but with the right tools and guidance, it becomes much simpler. One such tool is the JSON utility, which enables taxpayers to prepare and file their ITRs electronically. In this article, we will provide a comprehensive guide on how to download the JSON utility for ITR, along with step-by-step instructions. Whether you need to file ITR 1 or ITR 4, in XML format, this guide will help you navigate the process with ease.
Steps to download the JSON utility for ITR
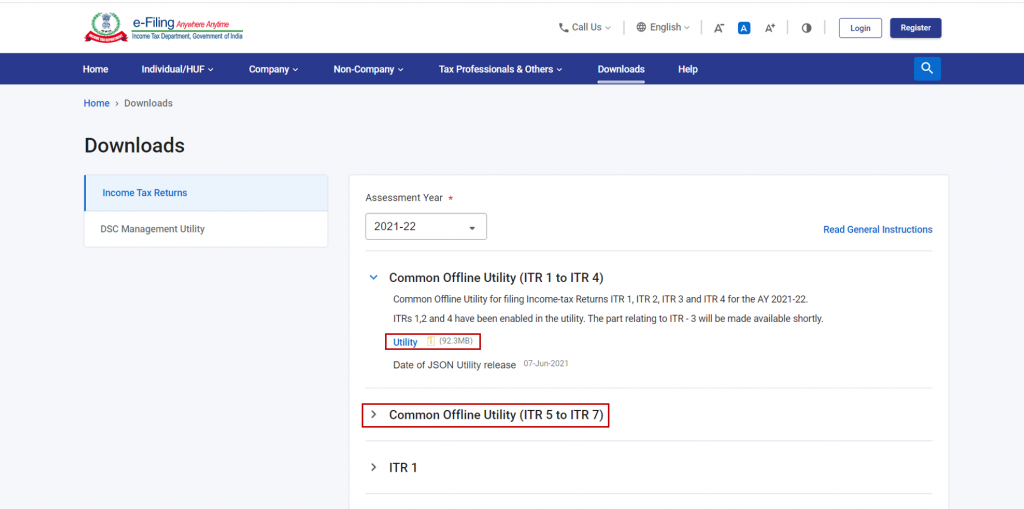
Step 1: Visit the Income Tax e-Filing Portal
To begin, visit the official Income Tax e-Filing portal and click on the “Downloads” tab. This is where you can access the necessary tools for downloading the JSON utility. Select the appropriate offline utlity for the form you wnat to file, and click on “utility” written in blue.
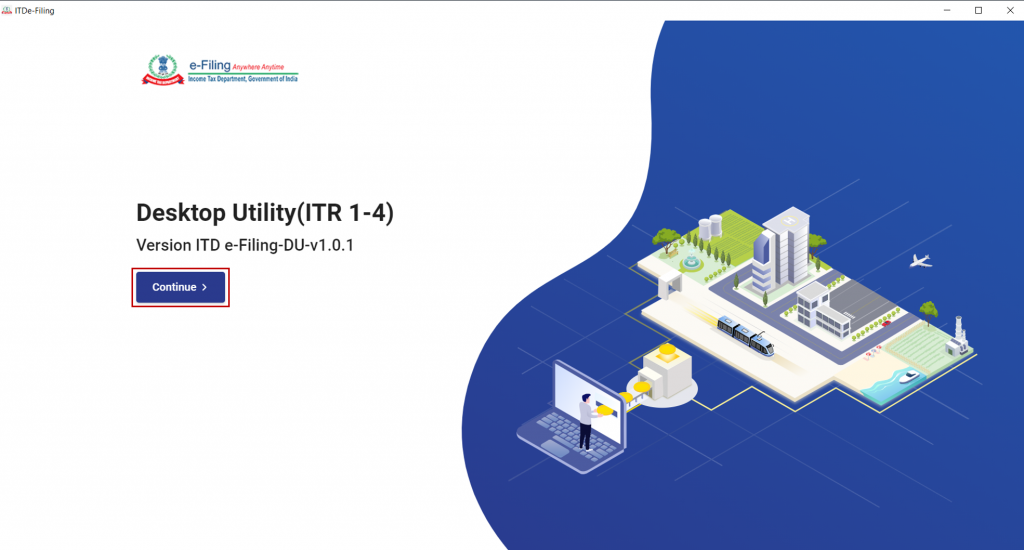
Step 2: Install the Appropriate ITR Utility
Install the file that you’ve clicked on. After successful installation, open the file and click on “Continue”.
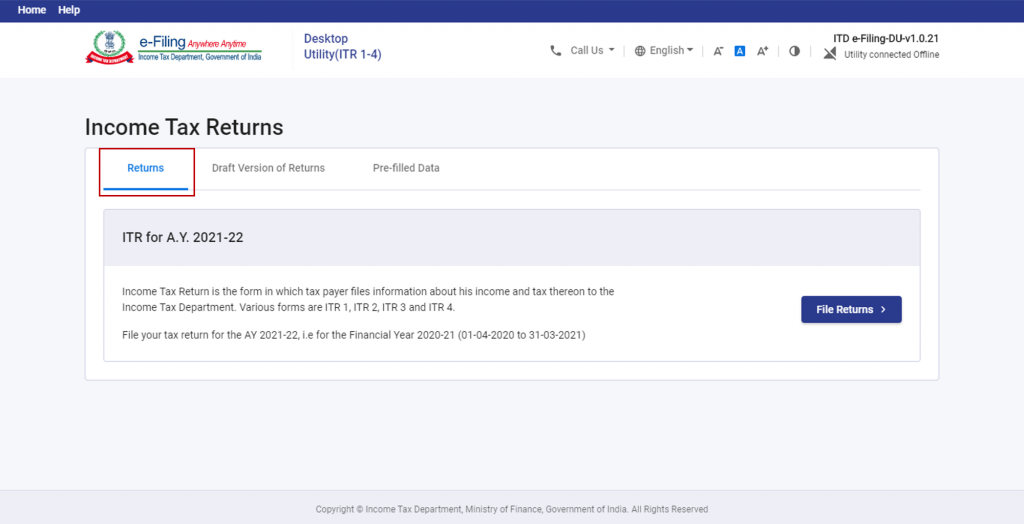
Step 3: Access the Income Tax Returns Page
Upon opening the utility, you will land on the Income Tax Returns page. Here, you will find various tabs with relevant content. These tabs include: Start the return filing process with the pre-filled data by clicking “File Returns” on the relevant JSON.
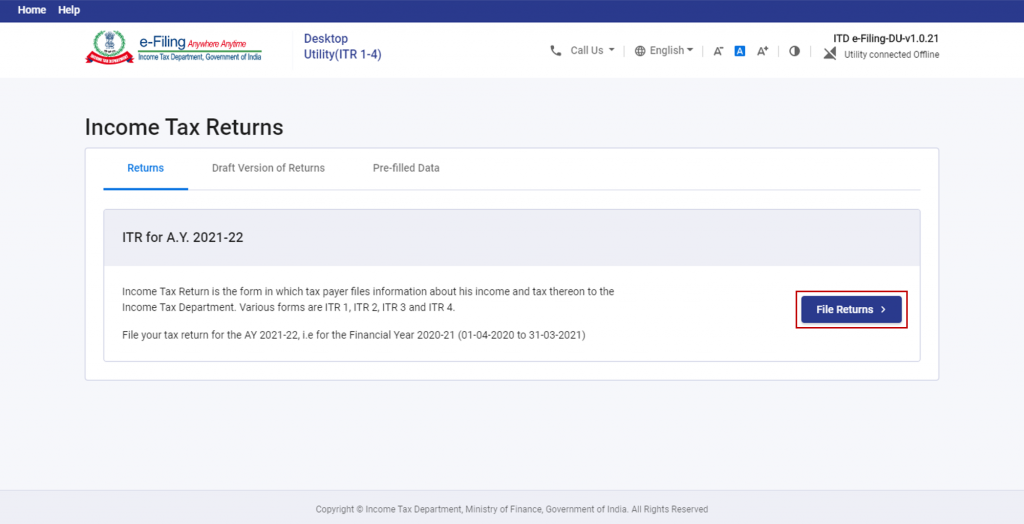
Step 4: File, Preview, and Submit Income Tax Returns
Under the “Returns” tab, click “File Returns” for the relevant AY to begin the ITR filing process.
Start filing a fresh return
Download Pre-Filled Data (JSON)
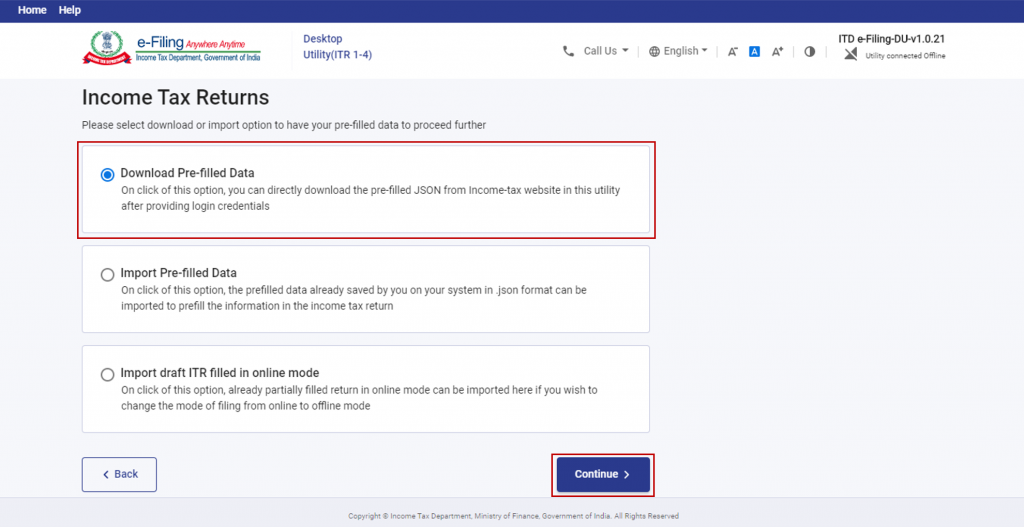
- Click “File Returns” under the “Returns” tab and then “Download Pre-filled Data.” Proceed by clicking “Continue.”
- Enter your PAN, select the Assessment Year (AY) as 2021-22, and click “Proceed.”
- You will receive a warning about discarding saved details if proceeding with a new filing. Click “Yes.”
- Login to e-Filing through the Offline Utility.
- After logging in, you will see your pre-filled data downloaded for the entered PAN and AY. Click “File Return” to proceed with the form selection.
Import Pre-Filled Data (JSON)

- Click “File Returns” under the “Returns” tab, then “Import Pre-filled Data,” and “Continue.”
- Enter your PAN and select the AY (2021-22) before clicking “Proceed.”
- Confirm your choice and click “Yes.”
- Attach the pre-filled data (JSON file) downloaded from the e-Filing portal and saved on your computer.
- After uploading the JSON file, click “Proceed,” and the system will validate the imported data.
- Upon successful validation, click “File Return” to pre-fill all the data from the imported JSON and proceed with the ITR form selection.
Import Draft ITR Filled in Online Mode
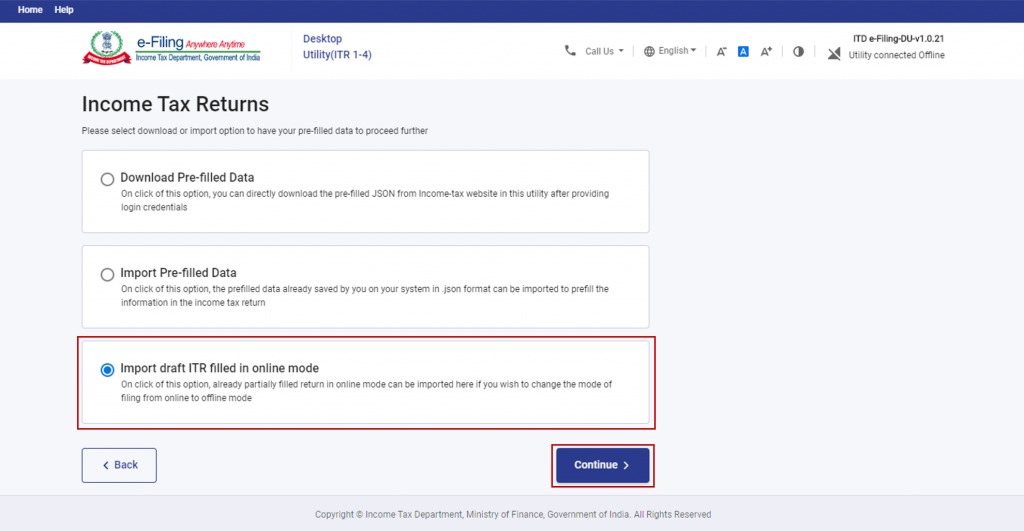
- Click “File Returns” under the “Returns” tab, then “Import Draft ITR filled in online mode,” and “Continue.”
- Attach the draft ITR JSON previously downloaded from the e-Filing portal and saved on your computer.
- After uploading, click “Proceed” and confirm your choice.
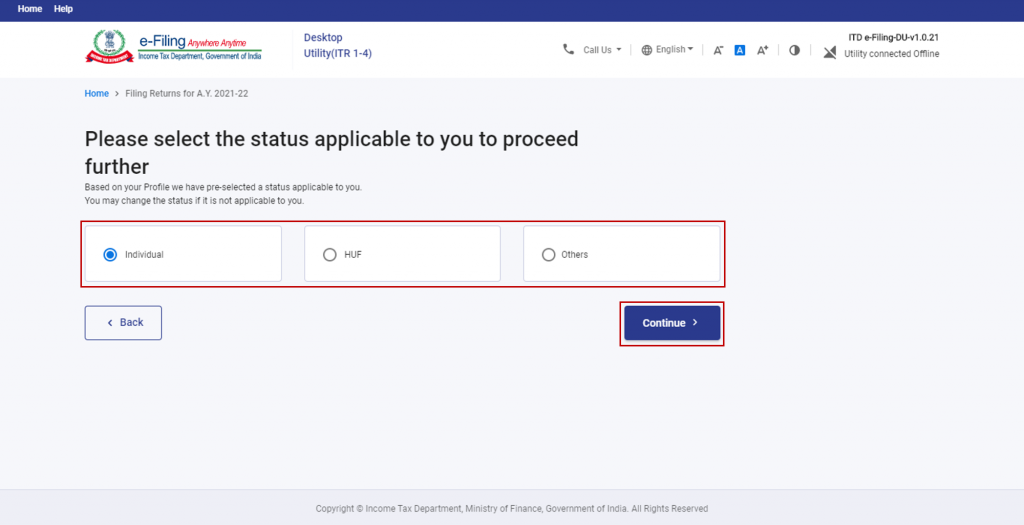
- Begin the ITR filing process by selecting your status (Individual / HUF / Other).
File, Preview, and Submit Income Tax Returns
Firstly, after downloading or importing pre-filled data, click “File Return” and select your applicable status. Click “Continue.”
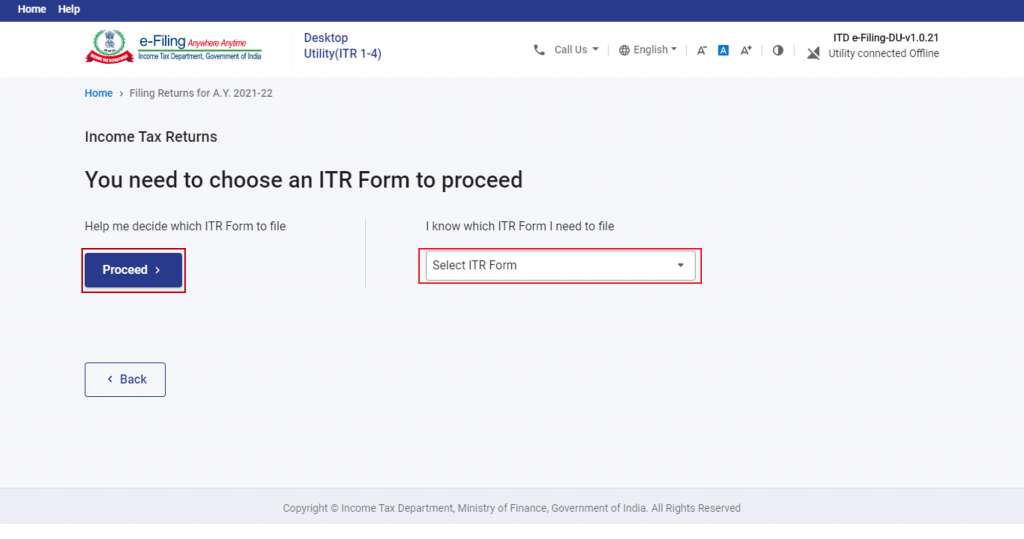
After that, choose the type of income tax return:
- Help me decide which ITR Form to file: The system helps you determine the correct ITR form.
- I know which ITR Form I need to file: Select the appropriate form from the dropdown.
Once you’re done clicking on the relevant form you will be shown a list of documents required for filing the form. Read the same and click on “Get Started”
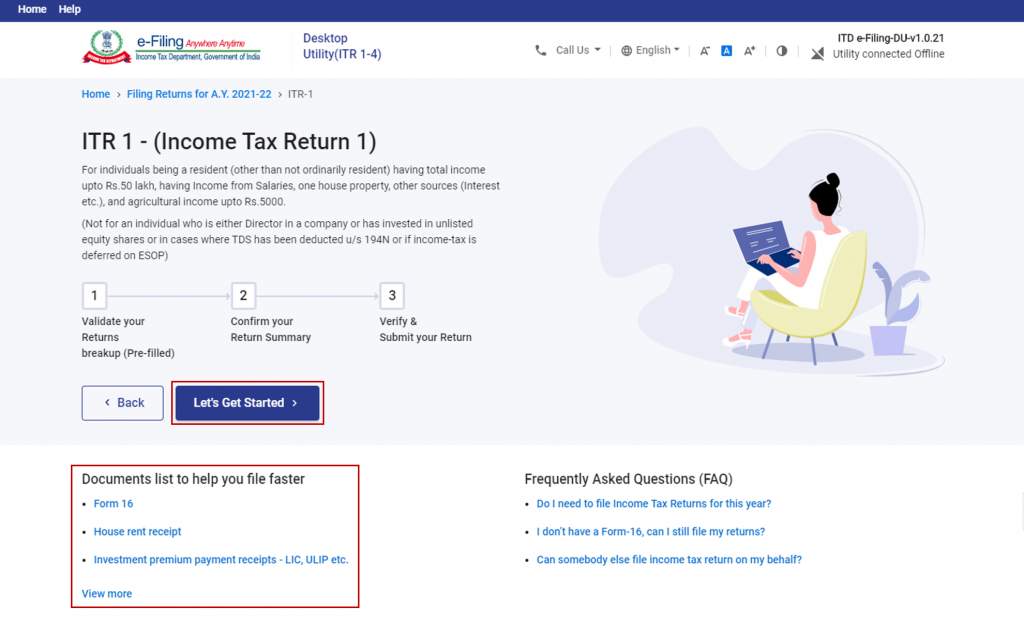
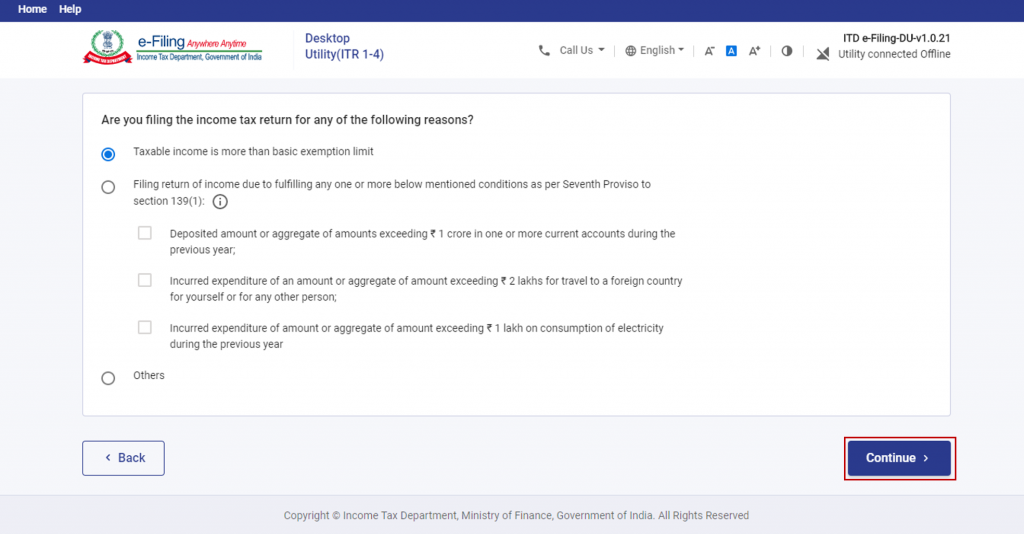
Choose the applicable reason for filing ITR.
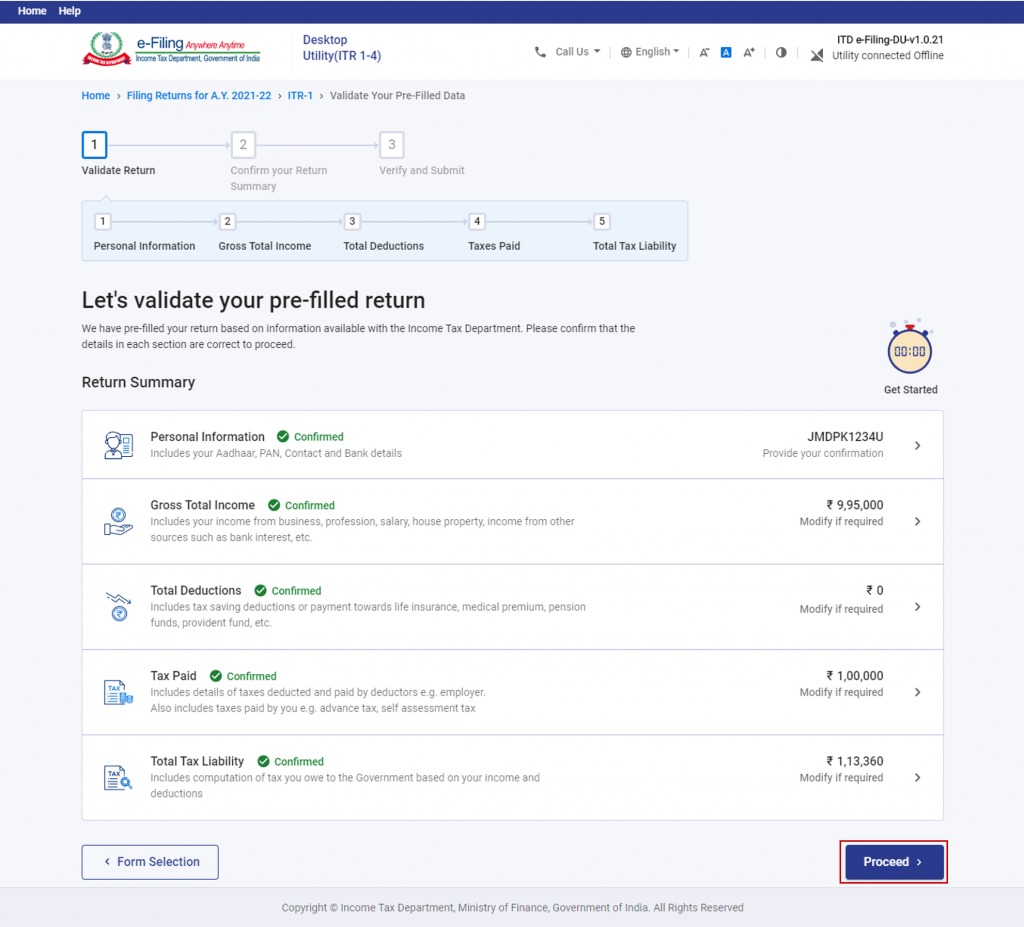
Review, edit, and enter your remaining / additional details in each section of the ITR form. Click “Proceed” after confirming all sections.
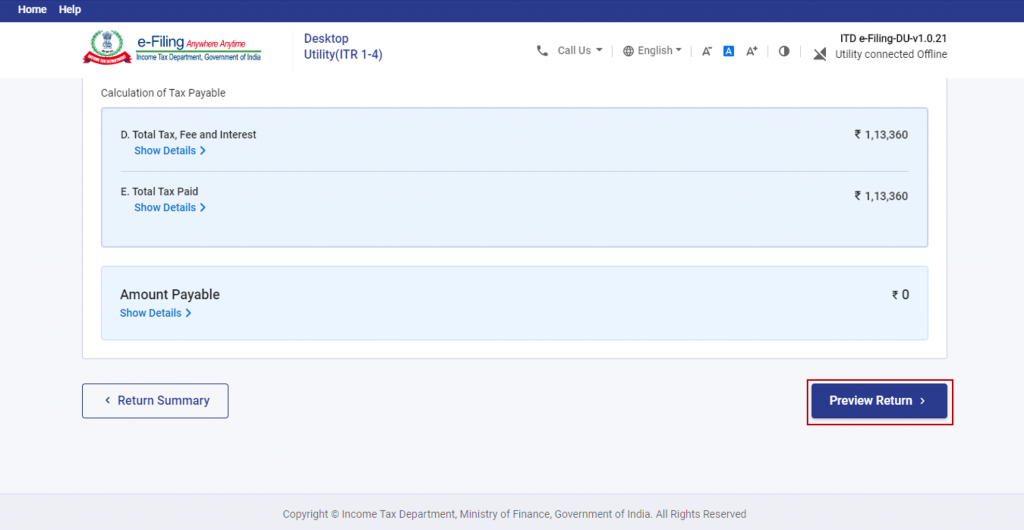
On the Confirm Your Return Summary page, you can choose to pay any tax liability now or later. For no tax liability or refunds, directly preview your return.
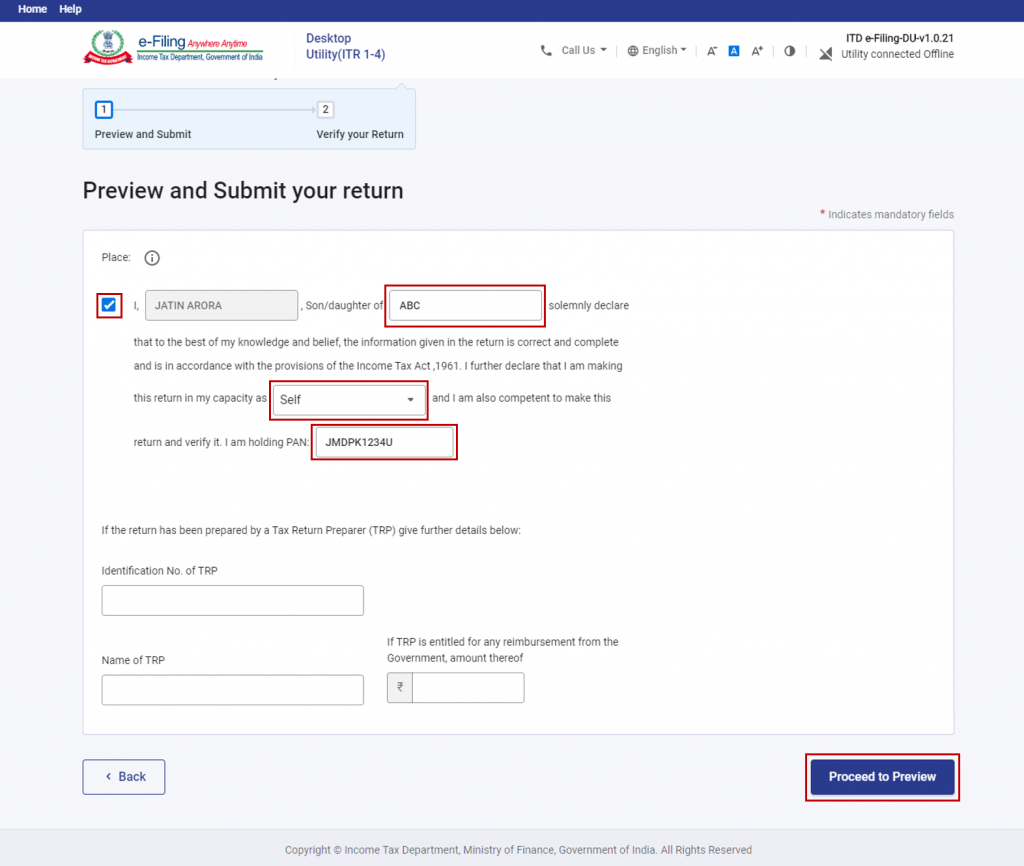
Click the declaration checkbox, enter the required details, and proceed for validation.
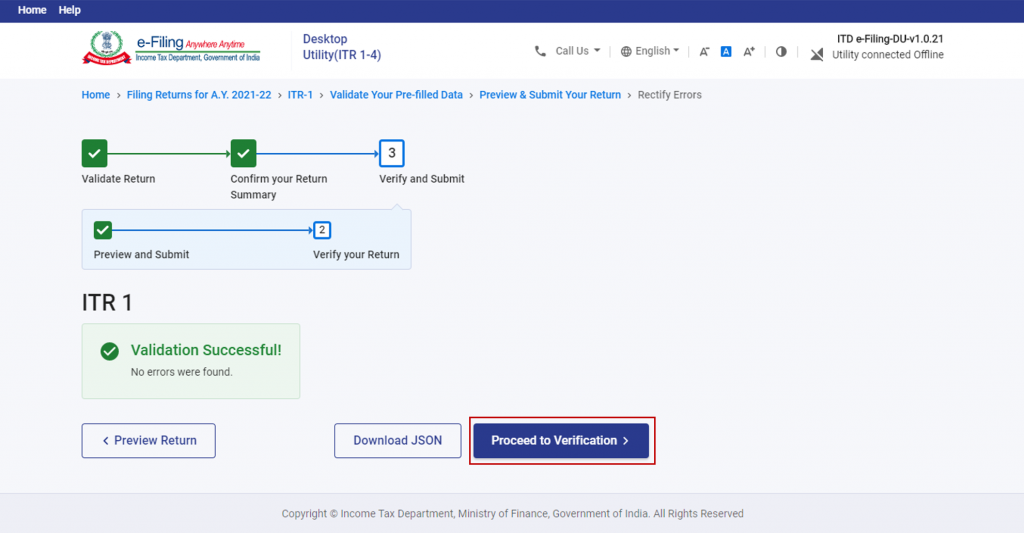
After that, the system will validate your return and display any errors. Correct them if needed, or proceed with a successfully validated return. Click on “Proceed to Verification” once all’s good.
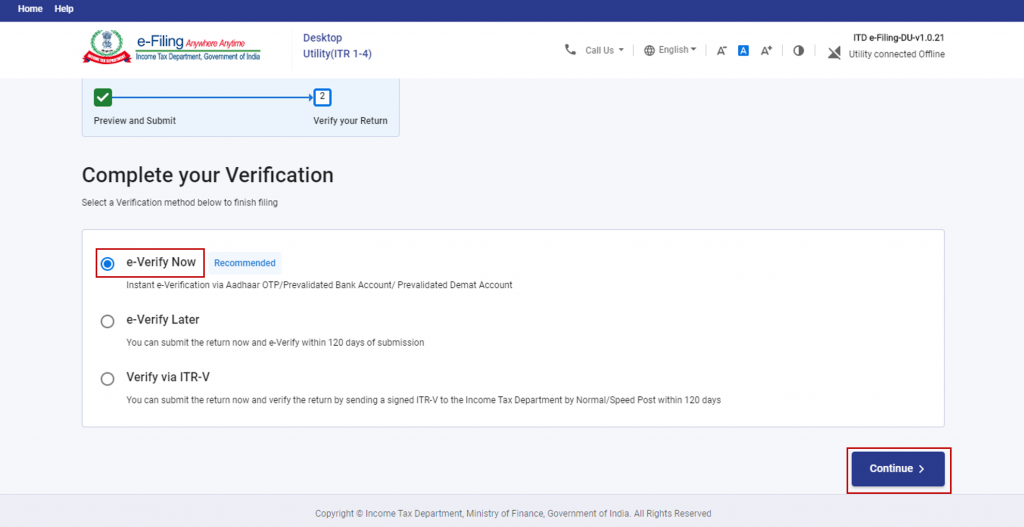
Finally, verify your ITR using one of the provided options – e-Verification being the recommended method for a quick, paperless, and safer verification process. You can e-verify via various options, such as you can e-verify via Aadhar, netbanking, etc.
Conclusion:
Downloading the JSON utility for ITR is a crucial step in the tax return filing process. By following the step-by-step guide provided above, taxpayers can easily download and import pre-filled data into the offline utility, simplifying the ITR filing experience. The Income Tax Department’s offline utility offers an efficient and user-friendly solution to ensure accurate and timely income tax return filings.
Frequently Asked Questions

Monjima Ghosh
Monjima is a lawyer and a professional content writer at LegalWiz.in. She has a keen interest in Legal technology & Legal design, and believes that content makes the world go round.