How to file GSTR-1 on GST portal
GSTR-1 is an important return that all registered taxpayers under the Goods and Services Tax (GST) regime have to file. It contains details of outward supplies made by registered taxpayers. If you’re wondering how to file this GST return filing, this comprehensive guide will walk you through the process, ensuring a smooth filing experience.
Process to file GSTR-1 on the GST portal
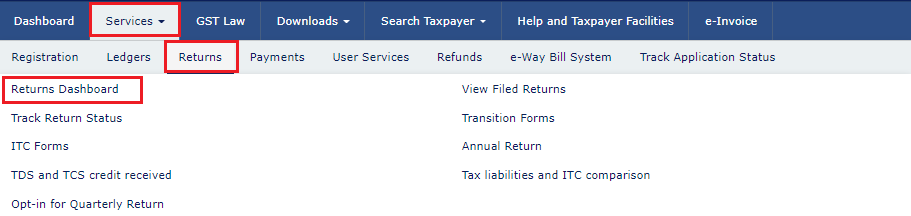
Step 1: Log in to the GST Portal
To begin, log in to the GST portal using your credentials. Once logged in, navigate to “Services” and click on “Returns” from the drop-down menu. Then select “Returns Dashboard.”
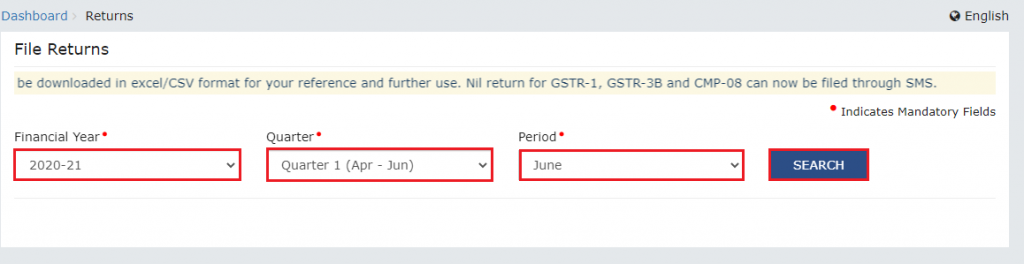
Step 2: Select the Financial Year and Filing Period
On the Returns Dashboard page, select the relevant financial year, Quarter and the month for which you want to file the return. Click on “Search” to proceed.
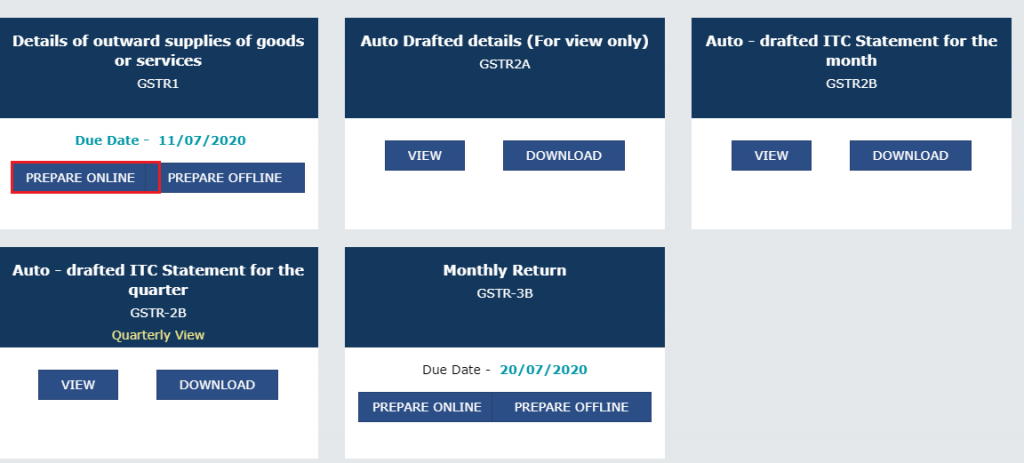
Step 3: Prepare the Return Online
On the GSTR-1 return page, you have the option to prepare the return either online or offline. For this guide, we will be focusing on preparing it online. Click on “Prepare Online” to proceed.
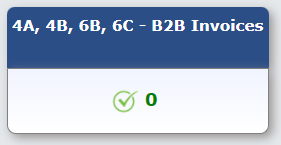
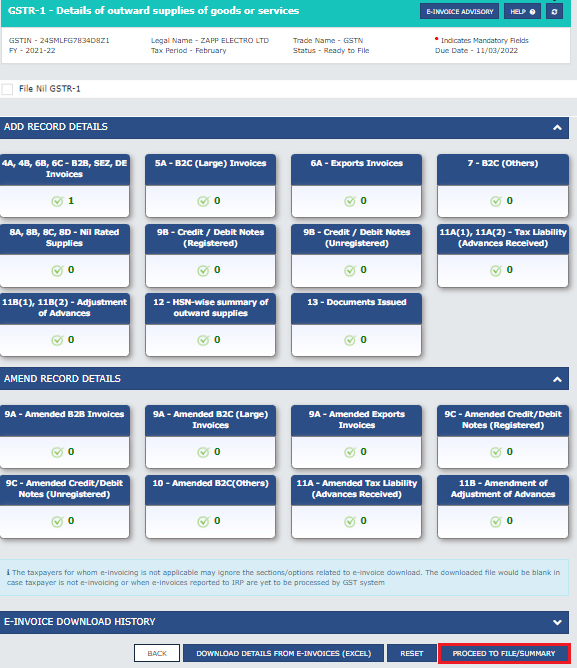
Step 4: Fill in the Details of Outward Supplies
You will be redirected to the “Details of Outward Supplies of Goods or Services” page.

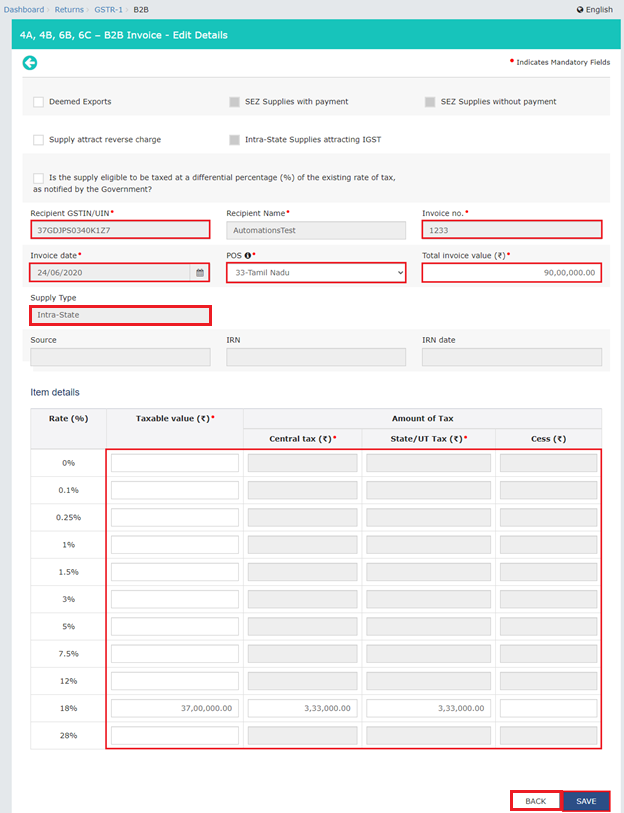
Step 5: Add or Delete Invoices or Details (E-invoicing eligible entities only)
If you are an e-invoicing eligible entity, you will be able tio click on the various tiles on that page that have the summaries of all the invoices entered to add or edit the details

To add or delete invoices or details:
- Click on the relevant tile
- Click on Add record

- Add or delete invoices or details as needed, click “Save” and then “Back”
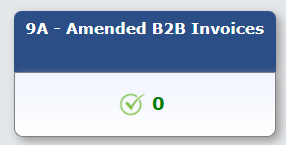
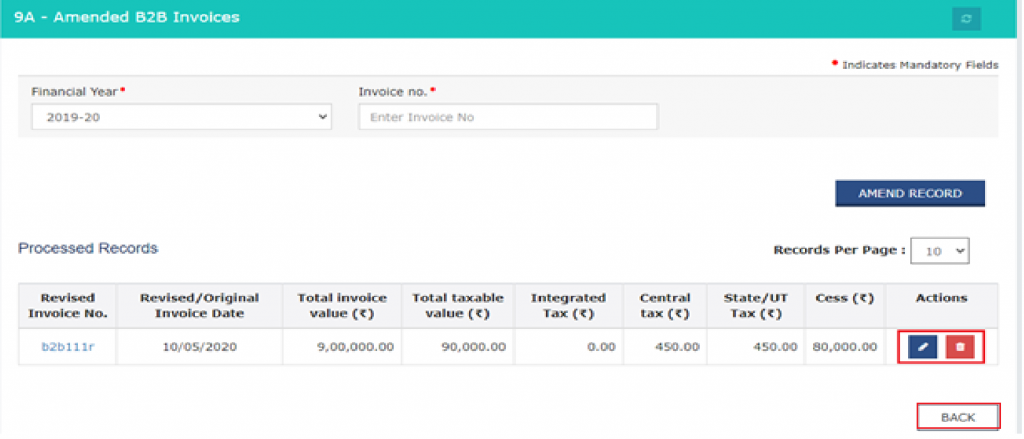
Step 6: Make Amendments to Existing Invoices
You can also make amendments to existing invoices by clicking on the relevant tile and providing the revised details.
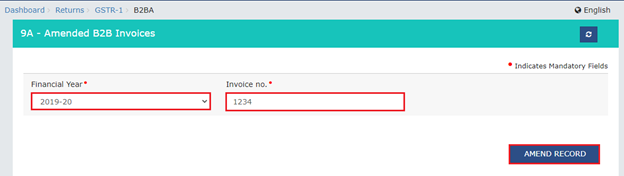
To make amendments to existing invoices:
- Click on the relevant tile
- Select the financial year from the drop-down list and and click on the “Amend Record” button.
- Then enter the invoice number or credit/debit note number which you want to amend and all the relevant details
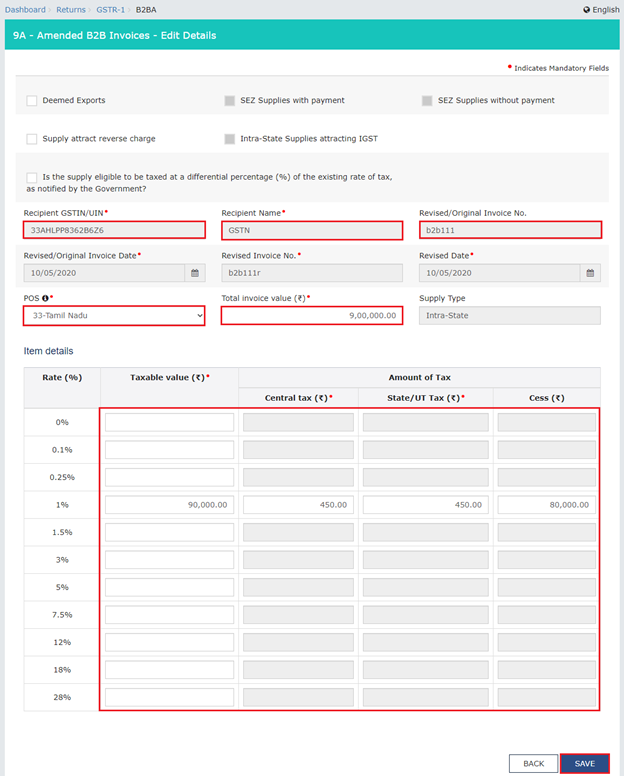
- Click on the Save button.
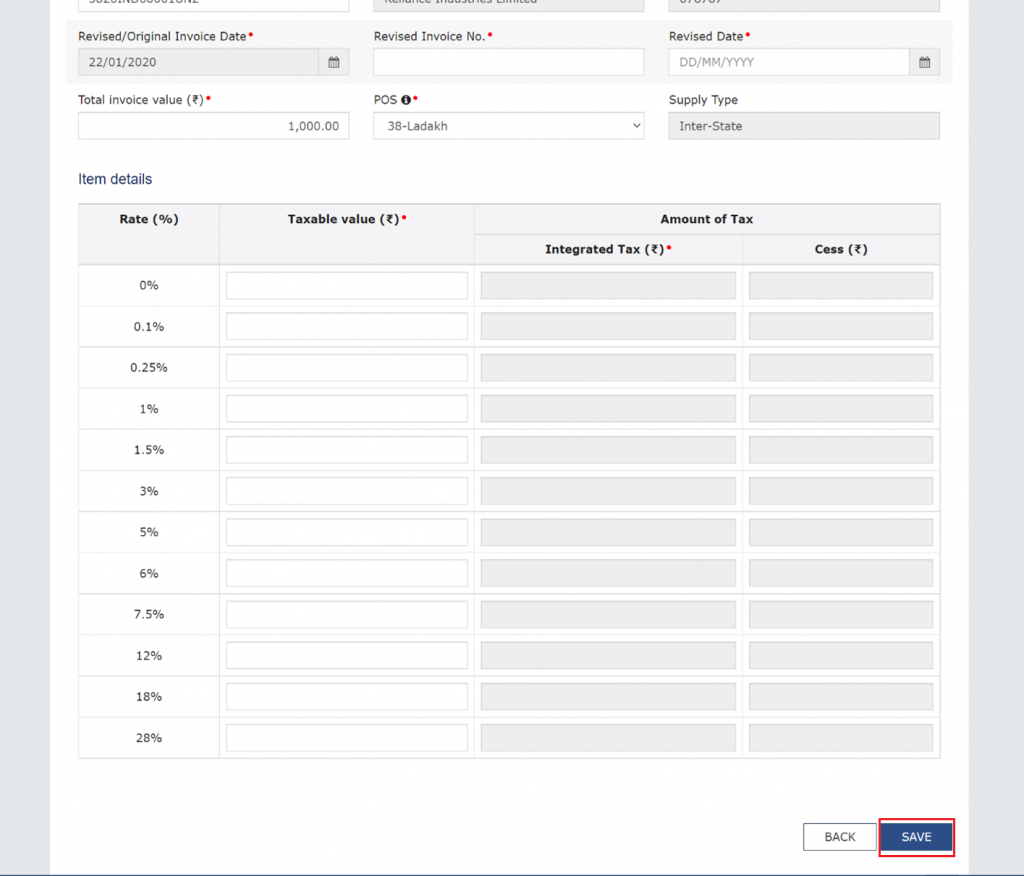
- Click on the “Back” button. You also have the option to further edit or delete the entry made.
Step 7: Generate GSTR-1 Summary
Scroll to the bottom of the page and click on “Generate GSTR-1 Summary” to include auto-populated details pending for action by recipients. The summary will be automatically generated at intervals of 30 minutes.

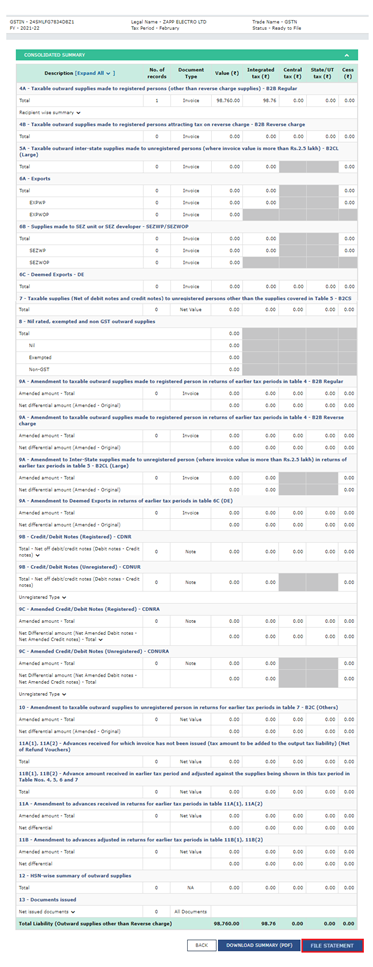
Step 8: Preview and Review the Draft Summary
After generating the GSTR-1 summary, click on the ‘Proceed to file/Summary’ button for a GSTR-1 draft summary. It is recommended that you review the summary of entries made in the various sections before submitting the GSTR-1.
Step 9: Submit the GSTR-1 Return
Once you have reviewed the GSTR-1 return and are ready to submit it, click on the “File Statement” button.
Step 10: File the GSTR-1 Return
Delect the acknowledgement checkbox confirming that you have reviewed the details and that the information furnished is correct and select your name from the drop-down. Once you select the acknowledgement checkbox, you will be able to click the file buttons. Choose the appropriate button.
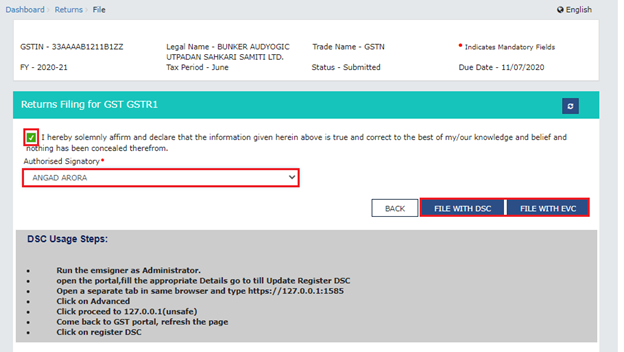
Step 11: File Return
Once the return is submitted, click on the “File Return” button. Choose either “File with DSC” or “File with EVC,” depending on whether you are filing with a digital signature (DSC) or an electronic verification code (EVC).
- If you are filing with a DSC Select the appropriate digital signature from the available options.
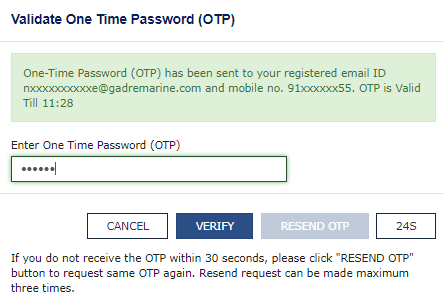
- If you are filing with an EVC enter the OTP sent to the mobile number and email address of the authorized signatory.
Step 12: Confirmation of Successful Filing
Upon successful filing, a success message will be displayed, along with the Application Reference Number (ARN). Make note of the ARN for future reference.
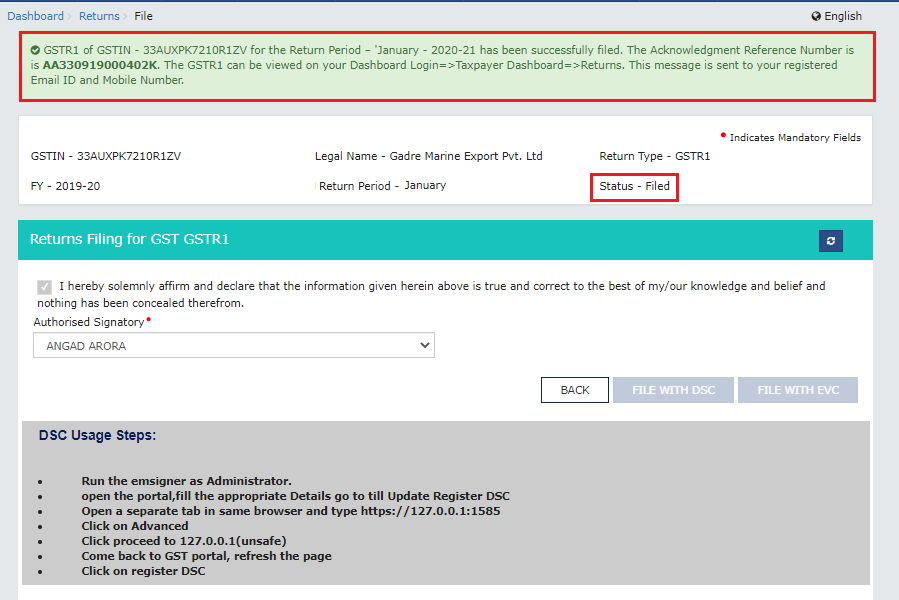
Congratulations! You have successfully filed your GSTR-1 return.
Note: You need to file GSTR-3B first to file GSTR-1.
Conclusion
Filing your GSTR-1 return accurately and on time is crucial for compliance with GST regulations. By following the step-by-step process outlined in this guide, you can successfully file your GSTR-1 return and fulfill your tax obligations.

Monjima Ghosh
Monjima is a lawyer and a professional content writer at LegalWiz.in. She has a keen interest in Legal technology & Legal design, and believes that content makes the world go round.